The Last Frontier

Showing posts with label Wild Plants. Show all posts

Tuesday, June 7, 2011

Wild Greens for Supper

Wild Edibles  for Fritters
Wild Greens for Fritters


One of the things we love about this time of year is that we have so many wild edible plants right outside our door. I have discovered (and invented) some delicious recipes. Fritters are one of our favorites, whether they're made with Fiddleheads, Dandelions, Wild Chives, Alaska Ginseng (Devil’s Club) or just about anything else we find in the woods or in our garden. We are especially thankful for all these wild greens because we can’t even plant our garden until the end of May.

While my husband has been away guiding for the last 7 weeks, our boys and I have been working extra hard all day. Well, the boys do get a lot of well-deserved play time at the creek. They have been such a help to me while their daddy has been away. The last couple of weeks have provided special treats of new wild plants. Lately, we’ve been stopping work an hour or so before suppertime to go for a walk and gather part of our next meal. It is incredibly satisfying to be able to do that (not to mention FUN), and I am so thankful that we live in such a place. I was brought up in a very large city, and I certainly do not take this lifestyle for granted. I know we have been blessed.

I grew up in the Deep South, where a meal was not a proper meal if it didn’t include something deep fried. Tomorrow night, I’m going to add some wild greens and Dandelions to our pizza (not fried, but I’m not complaining!) Tonight we had one of our favorite meals --- Fritters!

You can make fritters from just about anything. If you don’t have the wild plants I used this time (recipe below), use whatever edibles you have, even if they’re from the grocery store or a patio garden. Cabbage, broccoli, mushrooms, onions, and many more vegetables all work just fine. Use just one, or a mixture. Add meat, if you like, or leave it out. Add other herbs and seasonings for even more variety. Careful on that. It's easy to overpower the wild greens with too many spices.

When I want a sweet fritter for breakfast, rather than a savory fritter for supper, I’ll usually stick with flowers. Dandelion or Elder flowers work great for this. Just remember to use no more than half the salt in the recipe below, and omit the pepper. You can make the batter sweet by adding a few tablespoons of honey, brown sugar, or other sweetener. You can leave out the sweetener in the batter, and serve the fritters with maple syrup, jam, powdered sugar, or whatever else you like. Or, just toss some flowers into your favorite pancake batter.

You really can’t go wrong with fritters. If you want them a little lighter, add a tablespoon of baking powder per cup of flour. If you want eggs, use them. If not, leave them out. I use powdered milk and eggs because we live in the bush and I don’t have fresh at the moment. But if you have the fresh milk and eggs to spare, use them if you like. Your fritters will turn out delicious.

Wild Fritters
(This recipe makes a LOT, so you might want to cut it in half the first time. We like to reheat the leftovers. The texture changes --- they become a little soft, more bread-like instead of crunchy, but we still enjoy them.)

4 cups of edible wild greens and flowers
1 pound of meat - optional (ground moose or beef, chopped chicken or whatever you like)
3 cups rice flour (wheat flour works well, but the flavor and texture are a little different)
2/3 cup powdered milk (or 2 to 3 cups of fresh milk)
3 Tbsp. powdered eggs (or 2 eggs)
1 tsp. black pepper (or to taste)
2 tsp. salt (or to taste)
2 to 3 cups water (omit if using real, liquid milk)
Oil for Frying (I like coconut oil)

Prepare wild edibles for cooking, and set aside. Preparation will depend on what you use. Today, the boys and I picked some Alaska Ginseng (Devil’s Club) buds, Lamb’s Quarter, Chickweed, Dandelion flowers, Watermelon Berry leaves and Wild Chives. I chopped the Lamb’s Quarter, Chickweed, Watermelon Berry Leaves and Chives. I removed the stems and most of the calyx (green part) from the Dandelion flowers (scissors help with this). The Alaska Ginseng buds required no preparation, but you can chop them if you prefer. A few Fiddleheads and young Fireweed shoots would have also been nice, but it was getting late and I needed to start supper. If your plants have dirt, wash before chopping. Try to avoid places where the plants are near car exhausts, and don’t use plants that have been sprayed with chemicals.

If using meat, cook it and set aside. If it is really greasy, drain and discard the fat.

Combine flour, milk powder, egg powder, salt and pepper. Stir in 2 cups of water. If it seems dry and thick, add a little more water. If your batter ends up too thin, stir in a little more flour. Stir in the meat and prepared wild plants. The batter should not be like dough, but it should not be watery, either.

In a heavy skillet, heat oil for frying. You should have about ¼ to ½ inch of oil. More won’t hurt. Drop tablespoons of the batter into the hot oil. When the bottom is brown, turn and brown the other side. Watch to make sure they don’t burn. If you fry too slowly, they become greasy. When done, remove fritters from oil with a slotted spoon, and drain on paper towels. Serve with mustard, barbecue sauce, or just eat ‘em as they are.  We had them with a green salad of new Watermelon Berry leaves, Chickweed, Lamb’s Quarter, Wild Chives, French Sorrel from my garden, and Wild Geranium Flowers. I’ll try to remember to take a picture of the salad next time.
Wild Edibles - Fritters 1
Wild Edibles cooked up into Fritters

Wednesday, March 30, 2011

Medicinal Plants: Usnea

Usnea
Usnea (OOS-nay-uh or US-nay-uh) is a lichen, which is a symbiotic combination of an algae and a fungus. Usnea has numerous medicinal, as well as food uses, which I will get to in a moment. Some of its common names include Old Man’s Beard, Beard Lichen, Beard Moss, Moose Moss and Tree Moss (although it is not a moss). The common names pretty well describe the appearance of Usnea. It resembles Spanish Moss, however, the two are not related.

Usnea grows on every continent. In our area, Usnea primarily grows on the branches of spruce trees, but I’ve also seen it on birch and cottonwood. In the southeastern United States, it is commonly found on oak trees, as well as other types of trees. There are many varieties of Usnea, so search online or ask a local herbalist about which ones grow in your area. Some are a pale yellowish-greenish color; others are reddish brown. Still others are black. The stem of Usnea has a white core that can be seen when it is pulled apart. The “hairs” are a bit stretchy.

Some years, Usnea is abundant and the yellow-green variety that is found here often grows well over 12 inches long. Not this year. When our family went out to gather some a few days ago, we had to really hunt for it. I think I’m going to have to start selling my Usnea soap as a “limited edition” this year. I just made a couple of batches and will post pictures soon.

Medicinal Uses of Usnea

Usnea is an extremely useful antimicrobial, both internally and externally, effective primarily on the lungs and skin. It is often used to treat bacterial, viral and fungal infections. All of my resources really stress its antibacterial properties! It is reported to be an effective treatment for pneumonia, bronchitis, staph, strep, tuberculosis and urinary tract infections. I have successfully used it to prevent and treat colds and flu. It boosts the immune system and can be used like echinacea. Another great thing about Usnea is that it has anti-inflammatory and analgesic properties.

I have found Usnea to be most effective as a tincture when I feel like I’m coming down with a cold. It is not effective as a tea. I have since read that water does not extract the usnic acid, which is the primary medicinal component of Usnea; alcohol is necessary for that.

To prevent or treat infections, I usually take about 8 drops of the tincture, made with vodka or similar alcohol, two to three times daily. I also like to add usnea to my herbal mix when I make cough drops. It doesn’t actually help suppress a cough, but it has helped cure whatever has caused the cough and helps loosen it.

Usnea Tincture
Usnea being made into a tincture.

Usnea tincture can be used externally as a liniment to treat infections on the skin. It can also be used straight from the tree as an emergency wound dressing to prevent infections and gangrene.

To make Usnea Tincture, place crushed usnea in a jar, cover with at least 60 proof alcohol such as Vodka (not rubbing alcohol). Place the lid on the jar and keep the jar in a cool, dark place. Shake the jar daily. After at least 2 weeks, (but preferably 8 weeks or more) strain and pour into a dropper bottle. In his book, “The Way of Herbs”, Michael Tierra states that the usual dose is 5 to 10 drops.

Usnea on a drying rack
Usnea on drying rack.

Usnea as Food

Usnea is very high in Vitamin C, and is a carbohydrate. Before eating, Usnea should be soaked in several changes of water. The usnic acid can be very irritating to the digestive system. In the book, “Tanaina Plantlore”, Priscilla R. Kari states that the Inland Dena’ina Natives of Alaska sometimes eat Usnea as an emergency food or camp food after first boiling it in water.

Caution

Usnea, like all lichens, readily absorbs pollutants, such as heavy metals and radiation. Be careful where you collect lichens. Also, do not eat animals that have eaten contaminated lichens. The poisons have been known to pass to humans in this way.

Use caution and common sense when trying Usnea, or anything else, especially the first time. You never know how your body will react. Some time ago, usnic acid was found (or at least thought) to help with weight loss. A company produced a weight loss pill containing usnic acid, and from what I’ve read, it sounds like a few people over did it and had severe liver problems. I have read that once the ingestion of usnic acid is stopped, the problems will resolve. One thing to consider in this is that one constituent of Usnea was removed and used in a pharmaceutical preparation. However, plants, in their whole, natural form have many balancing constituents, and are therefore usually much safer, in my opinion, than a processed drug containing only an extract of a plant, possibly in concentrated amounts. Do your own research, talk with a knowledgeable healthcare provider, and then make your own decision about what to ingest.

Thursday, February 17, 2011

Birch Sap Wine

Birch Sap Wine

I had just been thinking about springtime and looking forward to tapping birch trees again when someone commented on my post here about Tapping Birch Trees. John lives in the UK and makes birch sap wine. Here is the link to his recipe. I am definitely going to give this a try in a couple of months, and will let you know how it goes. Thank you, John!

While you're over at Sticks' blog checking out his birch sap wine recipe, spend a little time. He has some great posts on bushcrafting, camping and the great outdoors!

The caption on the picture goes to the wine recipe on John's site, but for some reason, the pictures itself won't link properly. Sorry about that.

I'll post again when my boys and I get back from town. I've been putting off this trip for months, but now we're all kind of looking forward to it. We'll get to visit with several friends, so it should be fun.

Wednesday, February 2, 2011

How to Make and Use Spruce or Pine Pitch Salve


Beetle-killed spruce tree
with dripping pitch.
 I recently submitted this article on How to Make and Use Spruce Pitch Salve to Survivalist Blog. It was published today! The uses for Spruce Pitch and Sap are well-documented in books about Alaska Natives. The uses for Pine, however, are also documented, but more in writings by natural health practicioners. If you have pine trees in your area, that will work well.

I have been using Spruce Pitch for many years. Here are a few of the ways I use it:
  • On spider and other insect bites and stings
  • To prevent or cure infections of ugly scrapes
  • As a natural, safe and effective underarm deodorant
  • As a lip balm and hand cream to help kill germs and prevent illness 
  • To increase circulation and speed healing of a sprained ankle 
  • It makes homemade soap smell fantastic! I don’t know if it still has antimicrobial properties after it’s made into soap. I kind of doubt it, but it still smells delightful.
To learn more, read the full article at Survivalist Blog by clicking here.

Sunday, January 23, 2011

How to Make and Use Balm of Gilead

Balm of Gilead is a very handy addition to your first aid kit. In this article, I will tell you how to make Balm of Gilead, and how it can be used. It is mentioned in several places throughout the Bible. I’m not sure if the Balsam Poplar (Cottonwood) trees that we have in Alaska are the same ones mentioned, but they are of the Populus species, are commonly called Balm of Gilead, and have wonderful medicinal properties. In a future article, I will show you how to make Balm of Gilead cough syrup and cough drops.
Balsam Poplar Buds
Balsam Poplar buds

How to Make Balm of Gilead

The buds of the tree are used to make healing balms and cough remedies. The resin causes the buds to be very sticky; therefore, they are best collected when the temperatures are below freezing. If you wait until spring when the leaves begin to sprout, they will not be as potent for medicinal uses.

It is best to pick the buds during the winter
It is best to pick the buds when the temperatures are below
freezing because the buds are sticky when warm.

Collect at least a cupful of buds. You may want to make cough syrup after I post my follow-up article, so collect extra buds now and keep them in your freezer, if you have one.

Do not wash the buds. Try to collect them in dry weather, if possible, to reduce the water in your salve. Place the buds in a pan and cover with vegetable oil or melted, rendered animal fat. You may also use vegetable oils that are solid at room temperature such as palm oil and coconut oil. Melt them prior to pouring over the buds. The amount of oil isn’t an exact science. Just cover the buds so that you can stir them around a bit.

Infuse oil with the buds over low heat for a few hours
Cover buds with liquid oils, or melt rendered
animal fat or vegetable oils that are solid
at room temperature, such as palm or coconut.
Warm over very low heat for at least two hours. Because we have so much snow, I leave the lid off the pan for a little while to evaporate the water in the buds. If you are in a drier location and your buds aren’t covered with snow, covering the pan with a lid will retain more of the volatile oils. I set the pan on the coolest part of my woodburning cookstove for a few hours, and sometimes up to a few days. You could set the covered pan in the oven with only the pilot light burning. Just remember not to preheat the oven for baking while the pan is in there. Heating the oil and buds in the top of a double boiler for two or three hours is another good way to infuse the oil.

Stir the buds occasionally, and then strain through several layers of cheesecloth. I have found that I get a cleaner salve if I first strain through a wire sieve to remove the buds, and then through a few layers of cheesecloth.

If you are using liquid oil, you will probably want to thicken it with beeswax. Measure the infused oil and return to a clean pan. To each cup of oil, add 1 ½ to 2 Tbsp. beeswax. Over very low heat, or in the top of a double boiler, stir and melt the beeswax. Pour into clean tins or jars. Allow to cool and solidify before covering with lids. If your balm is too hard for your liking, melt with a little more oil. If it is too liquid, melt with a little more beeswax.

Beeswax
Beeswax can be purchased in blocks and chopped.
Use about 1 1/2 to 2 Tbsp. per cup of infused oil
to thicken for salves.
Vitamin E and Benzoin are good, safe preservatives. You may wish to add a dropper of liquid Vitamin E oil or ¼ tsp of Tincture of Benzoin or Gum Benzoin to each cup of your infused oil prior to pouring into containers.

How To Use Balm Of Gilead

According to Janice Schofield in Discovering Wild Plants, Balsam Poplar and Quaking Aspen are in the Willow family, and contain salicin and populin. These glycosides are similar to aspirin, and are effective in reducing pain, inflammation, and fever.

Of all the herbal salves I make, this is the best one I’ve found for chapped hands and lips. Most people love the fragrance of Balm of Gilead. When my boys were babies, I often used it on their bottoms to prevent or heal diaper rash. Friends have used it for saddle sores. It helps heal cuts and scrapes, and is helpful for arthritis and sore muscles. Be sure to make plenty. Once you try it, you’ll want to share it with friends.
Jar of Balm of Gilead
Jar of Balm of Gilead, ready to use.
Another excellent book that will help you learn about using plants is "The Way of Herbs" by Michael Tierra. I refer to this book often.


Saturday, December 18, 2010

Spruce Tip Jelly


Spruce Tip Jelly
Spruce Tip Jelly
A couple of days ago, the boys and I went out and picked a basketful of Spruce Tips --- the new growth on spruce trees. It's been several years since I've made Spruce Tip Jelly and I was beginning to crave this delicious treat, maybe because spruce needles, especially the new tips are super high in vitamin C and I've been out for several months. After making the jelly, I had plenty left over to brew a cup of Spruce Tip Tea, and then I spread out the rest to dry for tea or more jelly next winter.

Spruce is in the Pine family, so I'd think that the uses of the trees would be similar. The picture below shows the new growth that still has that brown coating on the tip. If they are still there when you pick the tips, then brush them off. Most of the ones we picked had already filled out a little and pushed off that brown tips.

Spruce tips are slightly tart. Not near as sour as a lemon, but once you take a sip of the tea you will not be surprised that they are so high in Vitamin C. Spruce Tip Jelly and tea are delicious!

This year I used a recipe from the Alaska Extension Service that calls for white granulated sugar. In years past, I extracted the juice, and then used a combination of honey and brown sugar instead of white sugar. My husband didn't care for my first few batches of Spruce Tip Jelly, but he enjoyed it this year. A few years ago I gave a jar to a friend in town who owns a wonderful Bed & Breakfast. She and her husband loved it, and let each of their guests sample just a taste each morning as a special treat.
Spruce Tips
Here's the recipe:

How to Extract Juice from Spruce Tips:

Yield: about 3 cups (enough for one batch of Spruce Tip Jelly)
  1. Gather at least 9 cups of spruce tips. Spruce tips are the new, soft, bright green growth on the tips of spruce branches.
  2. Place the cleaned spruce tips in a large saucepan. Fill pan with water to within two inches below the top. You should be able to see the water, but it should not cover the spruce tips. (The amount of water isn't critical.)
  3. Here's where I did not follow the extension service. I simply heat the water and allow the spruce tips to simmer, covered, for about 30 minutes. The extension service book says, "Bring to a boil in a covered saucepan and boil for 1 hour; reduce heat and simmer for 3 hours." I think that's overkill.
  4. Drain through a colander, and then strain the juice through a jelly bag or several layers of cheesecloth.

Spruce Tip Jelly

Yield: about 5 cups

3 cups spruce tip juice

4 cups granulated sugar

1 package powdered pectin (1 3/4 ounces)
  1. Sterilize canning jars and prepare lids.
  2. Measure sugar and set aside.
  3. Measure spruce tip juice into a large saucepan.
  4. Add pectin and stir until dissolved.
  5. Place on high heat; stir constantly and bring to a full rolling boil that cannot be stirred down.
  6. At once stir in sugar.
  7. Bring to a full rolling boil; boil hard for 1 minute, stirring constantly.
  8. Remove from heat and quickly skim off form. (Note: adding 1/2 tsp. butter to the juice helps reduce foaming.)
  9. Immediately pour jelly into hot canning jars, leaving 1/4 inch head space.
  10. Wipe jar rims and ad prepared two-piece lids.
  11. Process 5 minutes in a boiling water bath canner.

Spruce Tip Tea

This can be made two ways. I prefer to place a handful of spruce tips in a jar with a lid, fill with enough boiling water for a mug of tea, place the lid on the jar and let steep until cool enough to sip. Some people prefer to toss the spruce tips into a pot of boiling water and boil for about 5 minutes. I think that kills too many nutrients. Either way, strain and serve hot with honey or maple sugar to sweeten, if you like. Spruce Tip Tea is also nice with the addition of a few whole cloves, a little cinnamon, nutmeg, or grated orange peel.

Spruce tips can be gathered and used throughout the year, but they are best during the spring.

Alaska Ginseng (Devil's Club)


Devil's Club Buds
Buds of Alaska Ginseng, also known as Devil's Club
Echinopanax Horridum, more commonly known as Devil's Club, is in the Oriental Ginseng family. It is commonly found throughout Alaska, and therefore also known as Alaskan Ginseng. Most people are surprised that a plant with such an intimidating appearance has so many culinary and medicinal uses. This amazing, as well as beautiful plant is quickly becoming one of my favorites. (I know it doesn't look so beautiful now, but when the leaves are huge and the inedible red berries form above, it is lovely.)


Thanks to its sharp spines, Devil's Club is one of the easiest plants to identify at all stages of growth. If you've ever walked through the woods of Alaska or the Pacific Northwest, chances are you've seen, or been "attacked" by Devil's Club. If you happen to get stuck by one of the thorns, try to pull it out without leaving any broken off under your skin. Then make a poultice from a small piece of Devil's Club leaf and rub into the painful spot. It seems ironic that the "cure" is in the same plant that causes the pain and inflammation. The same is true of Stinging Nettle. I have tried this with both plants.

The parts of the plant that are used are the new buds and the root bark. The buds are mostly used in the kitchen, while the root bark has the medicinal properties. We began collecting Devil's Club buds a few weeks ago, and last week we dug some roots of the plants that we needed to clear from our yard. Within a quarter mile of our cabin are acres and acres of of Alaska Ginseng. The bark peels easily from the root.

Medicinal Uses of Devil's Club


Digging Devil's Club Root
Digging Devil's Club Root for the bark.

Because Devil's Club belongs to the Oriental Ginseng family, its uses are similar, and lab tests have shown no toxicity. However, as with any plant you have not tried before, proceed with caution. Eat only a very small amount (just a taste) at first, wait a day or so, and then work up slowly.

Colds, Pain and Bug Bites


Diggig Devil's Club Roots
Pieces of Devil's Club Root

It has been used often for the prevention and treatment of colds and other illnesses, and is said to be very helpful for sore muscles and the pain of arthritis. I don't have arthritis, so I haven't tried it for that. It appears to have wonderful anti-inflammatory properties, and also reduces the pain and swelling from bee stings and insect bites. My boys love playing with bees, and just accept the consequence of frequent stings. Fortunately, when the bees are out the Chickweed is abundant. (More about that in another post.) Since Chickweed is much easier to gather for an emergency bee sting than Devil's Club root, that's what they grab first.


Devil's Club Root
Pile of Devil's Club root dug from our yard

I'm soaking some of the Devil's Club root bark in olive oil now and will make a salve to keep on hand (as well homemade soap with the infused oil, and dried root bark for tea and tincture). I think it would be wonderful mixed with Comfrey root, which I grow in my herb garden. Comfrey's nickname is "Boneknit" because of its amazing ability to heal broken bones. I have used it in my family several times and am a strong believer! It is equally impressive in healing soft tissue. With little boys, I use it all the time for bumps, bruises and scrapes. But, Comfrey is not particularly helpful for pain. That's why I think Devil's Club and Comfrey mixed together would make an excellent salve to keep on the shelf for when one of my boys comes in with a scraped knee or a bump on the head after crashing his sled into a tree (that happens more often that I care to think about).

Lowered Blood Sugar and Weight Loss?

Devil's Club Root Bark
Peeled Devil's Club Root.
The root barkis the part used.

There have been reports of Devil's Club stabilizing blood sugar and reducing the need for insulin in diabetics. I find it interesting that Chickweed (like Devil's Club in it's use for bee stings and bug bites) also helps stabilize blood sugar. I have quite a sweet tooth. When I drink a little Chickweed tea or take a spoonful of the tincture daily, I no longer crave sweets. And if I do eat sweets while I'm using Chickweed, I don't have the blood sugar fluctuations that I usually feel. Normally, if I eat sweets at night, by morning my blood sugar is very low and I have an awful headache. When I drink Chickweed tea daily, that doesn't happen.

Another plus is that when I first started taking Chickweed, I lost 5 pounds the first two weeks although my diet had not changed! That was certainly a welcome "side effect"! :) I have since read that it helps metabolize fats, as well as carbohydrates, although I have not read any specific studies. I wonder if Devil's Club root does the same. I suspect it does.

Culinary Uses of Devil's Club

Drying Devil's Club Buds
Drying Devil's Club buds for the winter.

Even the new buds of Devil's Club have spines, but they are soft. Rub in the direction they grow and you will see what I mean. If it hurts to pick them then they are too old to eat. The buds are not an ideal trail snack "as is", however, if the spines are really soft, the buds can be eaten raw.

Devil's Club buds taste a little like celery, only not as sweet. I like to use them fresh, as well as dehydrated as I would use celery. In one of the pictures you can see the buds that I pulled apart and placed on the shelves of the non-electric food dehydrator.

Devil's Club
Plate of deep fried Devil's Club Buds, along with
Batter Fried Wild Chives. Delicious!

Once cooked, the flavor changes and doesn't quite keep that celery-like flavor, although it is still delicious. It's hard to describe because it has a taste all its own. We love this time of year when they are a special treat for us. We especially enjoy the buds chopped in egg and potato dishes. When I want to keep the celery flavor in cooked foods, I prefer to use Cow Parsnip stems. Since we live so remote, I can't get to the store to purchase celery, and it doesn't grow well here. I much prefer to use wild plants whenever I can!

In the last picture, you see a plate full of batter fried Devil's Club buds and Wild Chives. Our cultivated chives don't hold a candle to the wild ones. I've never measured, but I usually chop a large handful or two into batter, and either fry them up alone or add them to the batter with Fiddleheads or Devil's Club buds.

Fiddlehead and Fireweed Recipes

Fiddleheads and Fireweed for a Delicious Supper

 
Fiddleheads ready for picking
                                                                  
Fiddleheads are really just baby ferns. Keep reading for some of my favorite Fiddlehead and Fireweed recipes. Most of the fiddleheads growing in Alaska have this papery brown coating that must be cleaned off before cooking. If you live where ostrich ferns are plentiful, you are fortunate. They're "naked", meaning that they don't have that heavy coating, and you will be spared many hours of work. When we've had all the hours of "fun" we can stand cleaning fiddleheads, we start picking the young fireweed shoots.

Many people think fiddleheads and fireweed shoots taste a lot like asparagus. I see the similarities, and often interchange recipes, but there's a big difference to me. I much prefer fiddleheads to asparagus, but maybe that's because fiddleheads are the first wild greens to come up here, even before all the snow has melted, and because they are the first fresh produce we've tasted in several months. They usually start about the time the birch sap stops running and we're still craving all those natural vitamins and minerals.

The new fireweed shoots are great because they don't have to be cleaned. Sometimes they can be a little tough, even when they are young, but generally we like them, and I use them in all of the following recipes, either with or instead of fiddleheads. I will try to remember to take some fireweed pictures and add them, so come back in a day or so if you'd like to see what a young fireweed shoot looks like.

Cleaning fiddleheads is simple, but slow. Everybody cleans them differently, but I've found that keeping them dry works best. I use a scrubber sponge --- one of those rough, green pads used to clean pots and pans. Just lightly rub each side of the fiddlehead with the sponge. You don't have to get off every little paper scale. Just do the best you can. The "paper" doesn't have much flavor. It's just visually unappealing when too much is left on. These recipes can also be used for broccoli, cauliflower or asparagus.

See the pictures for what to pick. They should still be coiled up, like the head of a fiddle. If they are starting to open, just leave them. Fiddleheads must be cooked before eating. If you eat lots of raw fiddleheads, they will deplete your body of thiamine. If you've ever tasted a raw fiddlehead, you will not want to eat many of them that way. But cooked ---- now that's another story!

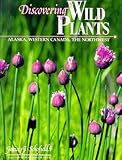
Before I get to the recipes, I'd like to tell you about a wonderful book, Discovering Wild Plants: Alaska, Western Canada, The Northwest by Janice Schofield. It was the first plant book I bought when I came to Alaska, and has been an invaluable resource for me in learning to identify wild plants as well as helping me to form a basic understanding of their uses. The photographs are excellent, but what makes this book so useful for plant identification are the detailed sketches and descriptions of each plant. The author discusses the plant's appearance, when to harvest, which parts to harvest, medicinal and food uses, historical information, and potential dangers. If you live in Alaska, western Canada or the Pacific Northwest and are interested in wild plants, this books is a must have.

Batter Fried Fiddleheads

This recipe makes enough for a hungry crowd. You could cut the recipe in half, but when we eat them with a sprinkle of my seasoning mix, my boys wish I'd made a double batch!

Ingredients:

3 to 4 pints of fiddleheads, freshly picked and cleaned

3 cups rice flour --- wheat flour will work, but they won't be as crisp. Also, rice flour contains no gluten.

2 1/4 teaspoons salt

1/2 teaspoon black pepper

1/2 cup powdered eggs

3 Tablespoons melted butter or olive oil

about 2 1/2 to 3 cups water (more or less -- you want the batter thick, but not like dough)

If you like, blanch about 3 to 4 pints of freshly picked and cleaned fiddleheads. Blanching isn't necessary, and if I'm short on time, I skip this step. It does make them a little more tender, but they are still delicious without blanching first. If you choose to blanch them first, do this by dropping a fairly small amount all at once into rapidly boiling water. I put a lid on the pot and time it for 1 minute, then strain out the water. Set aside to cool while you make the batter.

(note: if you like, use 4 fresh eggs instead of egg powder, and decrease the water to about 1 1/2 cups)

Sift together the dry ingredients because egg powder tends to be lumpy. But if you are using fresh eggs, just stir together the flour, salt and pepper. Next, stir in the melted butter or olive oil, and gradually stir in the water (and eggs, if you're using fresh ones). The batter should be somewhat thick. You can add more flour or water to get the preferred consistency. Fry up a few as a test, then adjust the batter if necessary before stirring in all the fiddleheads. We prefer a thicker batter.

Use whatever kind of fat you like for deep frying. Heat it to about 350 degrees F. Drop by rounded tablespoons into the hot grease and fry until they float and are lightly browned on one side, then turn to brown the other side. If you use rice flour, it will take a bit longer to brown, but they will be nice and crunchy! Drain on paper towels. Fry up another batch. Sprinkle with salt or my seasoning mix, below. These are also good dipped in a mixture of equal parts prepared mustard and highbush cranberry catsup.

Variation:

Wild chives are abundant around here right about when the fiddleheads are ready. My boys love it when I add a handful or two of chopped chives (onions would be great, too).

Sometimes I brown a pound or two of ground moose or beef, drain and add it to the batter along with about a pound of chopped cheese (Cheddar, Colby and Swiss cheeses are all delicious in this).

Vary the seasonings to suit your taste. Sometimes I toss in a tablespoonful or two of caraway seeds or a little dill. Or try a mixture of sage, rosemary or any other herbs you enjoy.

Seasoning Mix for Fiddleheads or French Fries

(I like to keep this on hand to season lots of things)

Mix together in a jar:

3 Tablespoons salt

1 1/2 Tablespoon onion powder

1 Tablespoon chili powder

2 teaspoons garlic powder

1 teaspoon (more or less to taste) ascorbic acid powder (vitamin C - available in health food stores)

Boiled Fiddleheads

Fiddleheads
Fiddleheads before and after cleaning the "silk"
Clean fiddleheads and drop into boiling water. Cook until tender, about 15 minutes. For variety, cook them with a few young fireweed shoots. You can serve them either hot or cold with your favorite salad dressing or topped with your favorite sauce. Fiddleheads are especially good with a cheese or mustard sauce. We often eat them cold, and I mix up some olive oil, apple cider vinegar, and various seasonings for a salad dressing. When we have wild chives, I like to chop them into a jar and cover with apple cider vinegar. In a week or so, the flavor really comes out. I use this vinegar in salad dressings.


Cheese Fiddlehead Casserole

4 Tablespoons butter

4 Tablespoons flour (Tapioca flour works well if you want it gluten free)

2 cups milk (You may want to add more milk or some cream later after stirring in the fiddleheads.)

In a large pan, melt the butter. Stir in flour and cook, stirring for 2 minutes. Gradually stir in milk. Cook, stirring over medium heat until thickened. Then stir in the following. You can use whatever cheeses and seasonings you like. This is a combination I use sometimes:

3 cups cubed cheddar cheese

salt to taste - about 1 to 2 teaspoon

pepper to taste - about 1/2 to 1 teaspoon

1/4 cup chopped onion

3/4 teaspoon ascorbic acid powder (vitamin C - available in health food stores)

2 cloves garlic, peeled and crushed or chopped

1/4 teaspoon basil

1/4 teaspoon thyme

pinch of celery seed

1 teaspoon mustard powder

Now stir in:

4 cups cleaned, boiled fiddleheads

3 cups cooked rice

Spoon into buttered 9" x 13" pan and bake. Bake uncovered in 350 degree F. oven about 30 minutes, until bubbly. If desired, before baking, sprinkle the top with seasoned bread crumbs and dot with butter. You can also stir in some chopped or ground, cooked meat before baking.

Fiddlehead Pickles (1)

Fiddlehead Pickles


Makes 5 pints (but you can easily adjust this to fit the amount of fiddleheads you have)

Prepare pint jars and lids according to package directions. Keep lids in hot water until ready to use.

Fill sterilized pint jars with cleaned, raw fiddleheads, leaving about 1/2 inch headspace.

Into each jar, place:

1 sprig of fresh or dried dill

2 cloves garlic

1/2 teaspoon mustard seeds

1 teaspoon dill seeds

1 hot red pepper

In a saucepan combine the following, bring to a boil, and simmer 15 minutes:

3 cups distilled, white vinegar (apple cider vinegar tastes good, but turns cloudy)

4 cups water

1/3 cup pickling salt

3 Tablespoons pickling spices that have been tied in a piece of cotton or several layers of cheesecloth

Remove the spice bag and pour the hot mixture over fiddleheads, leaving about 1/2 inch headspace. Put lids and bands on each jar. Process in a boiling water bath 15 minutes.

Fiddlehead Pickles (2)

Makes about 10 pints (but you can adjust this for the amount of fiddleheads you have)

Prepare pint jars and lids according to package directions. Keep lids in hot water until ready to use.

Fill sterilized pint canning jars with cleaned, raw fiddleheads, leaving 1/2 inch headspace.

Into each jar, place:

5 whole cloves

3 peppercorns

1 clove garlic

1 sprig fresh or dried dill

In a saucepan combine, bring to a boil and simmer 15 minutes:

6 cups distilled, white vinegar

8 cups water

2/3 cup pickling salt

6 to 12 good splashes (to taste) of hot pepper sauce (such as Tabasco)

3 Tablespoons each of dill seeds and mustard seeds that have been tied in a cotton cloth bag or several layers of cheesecloth.

Pour hot mixture over fiddleheads, leaving 1/2 inch headspace. Put lids and bands on each jar. Process in a boiling water bath 15 minutes.

(Note: the above recipes make great fireweed, radish, turnip, broccoli or cauliflower pickles, too. For broccoli and cauliflower, cut into desired size pieces, then blanch in boiling water 2 minutes prior to packing into jars.)


Fiddleheads
Fiddleheads

Related Posts Plugin for WordPress, Blogger...